

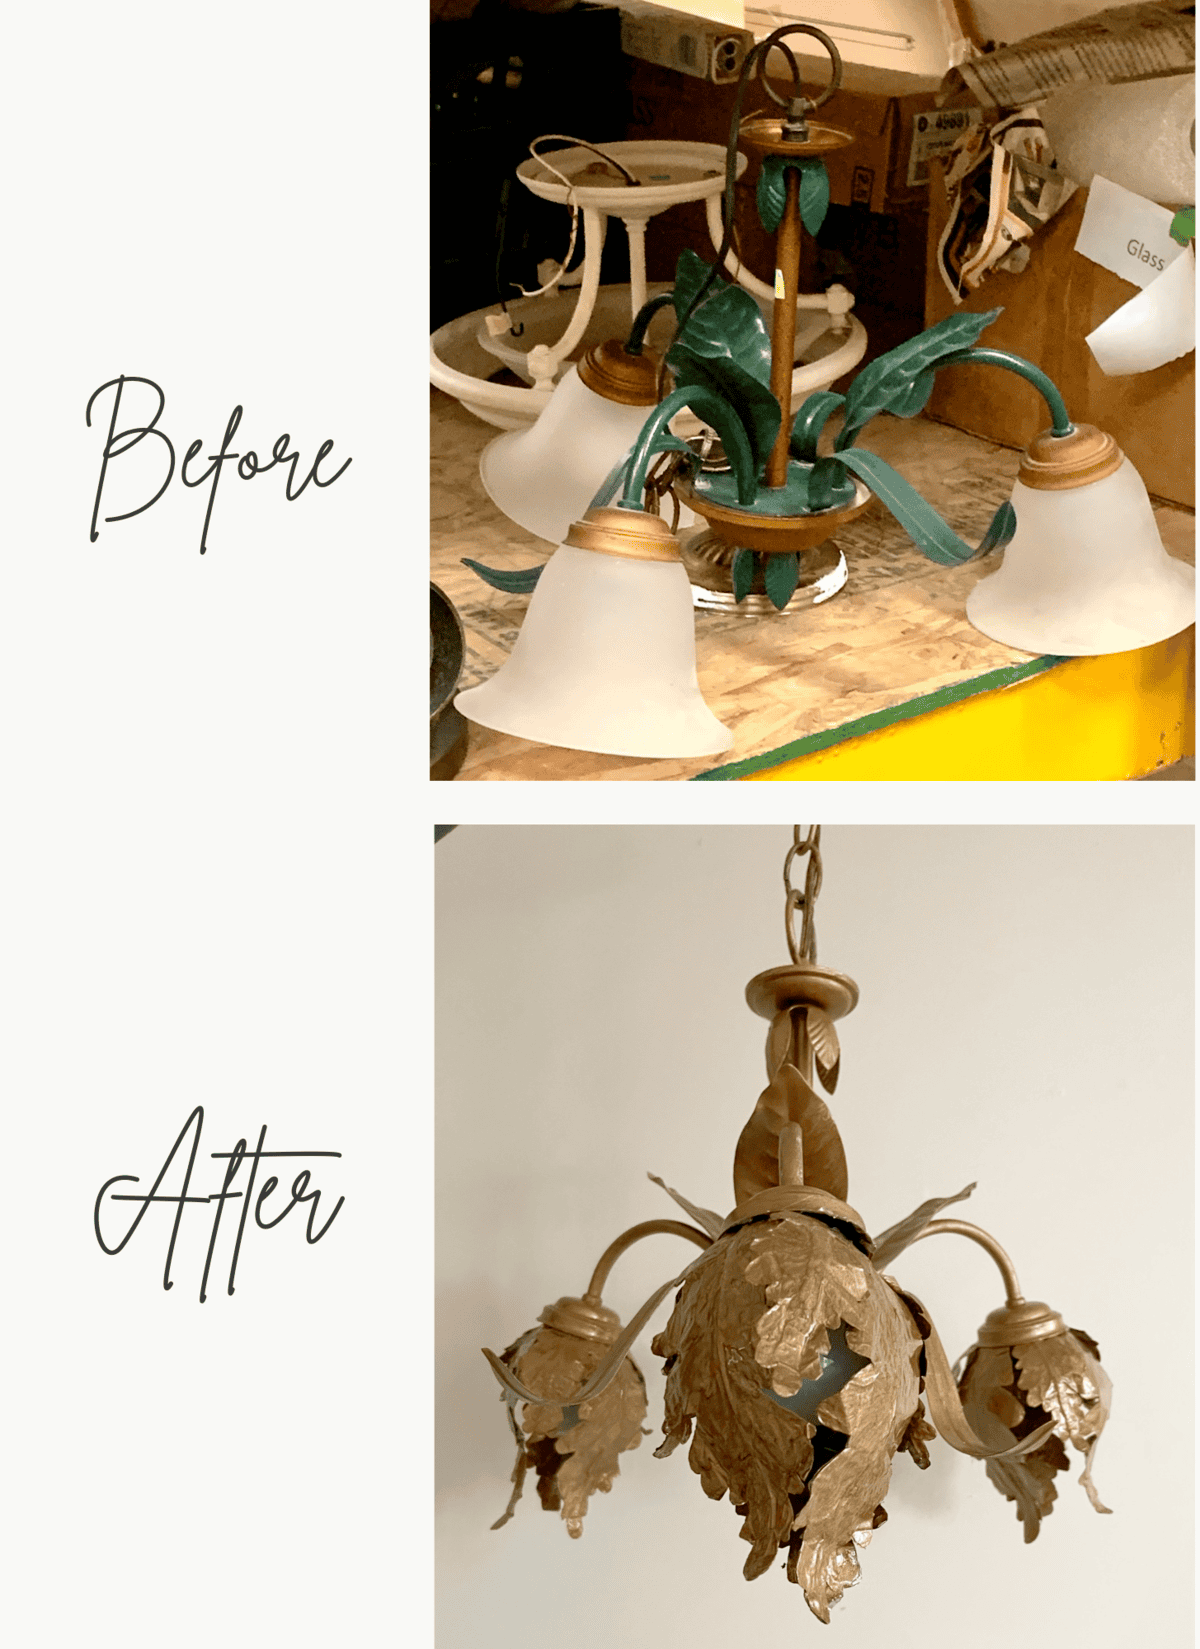
You are not going to believe this light fixture thrift flip!
In this post I’ll show you how we turned a dated old light fixture into an elegant floral inspired vintage chandelier.
The best part is that it hardly cost us a thing!
Light Fixture Thrift Flip
We wanted to update the old ceiling fan in Mary’s bedroom, but costs needed to be low. Also we wanted something unique and amazing.
So we came up with an answer!
My Favorite Place to Shop for Used Light Fixtures
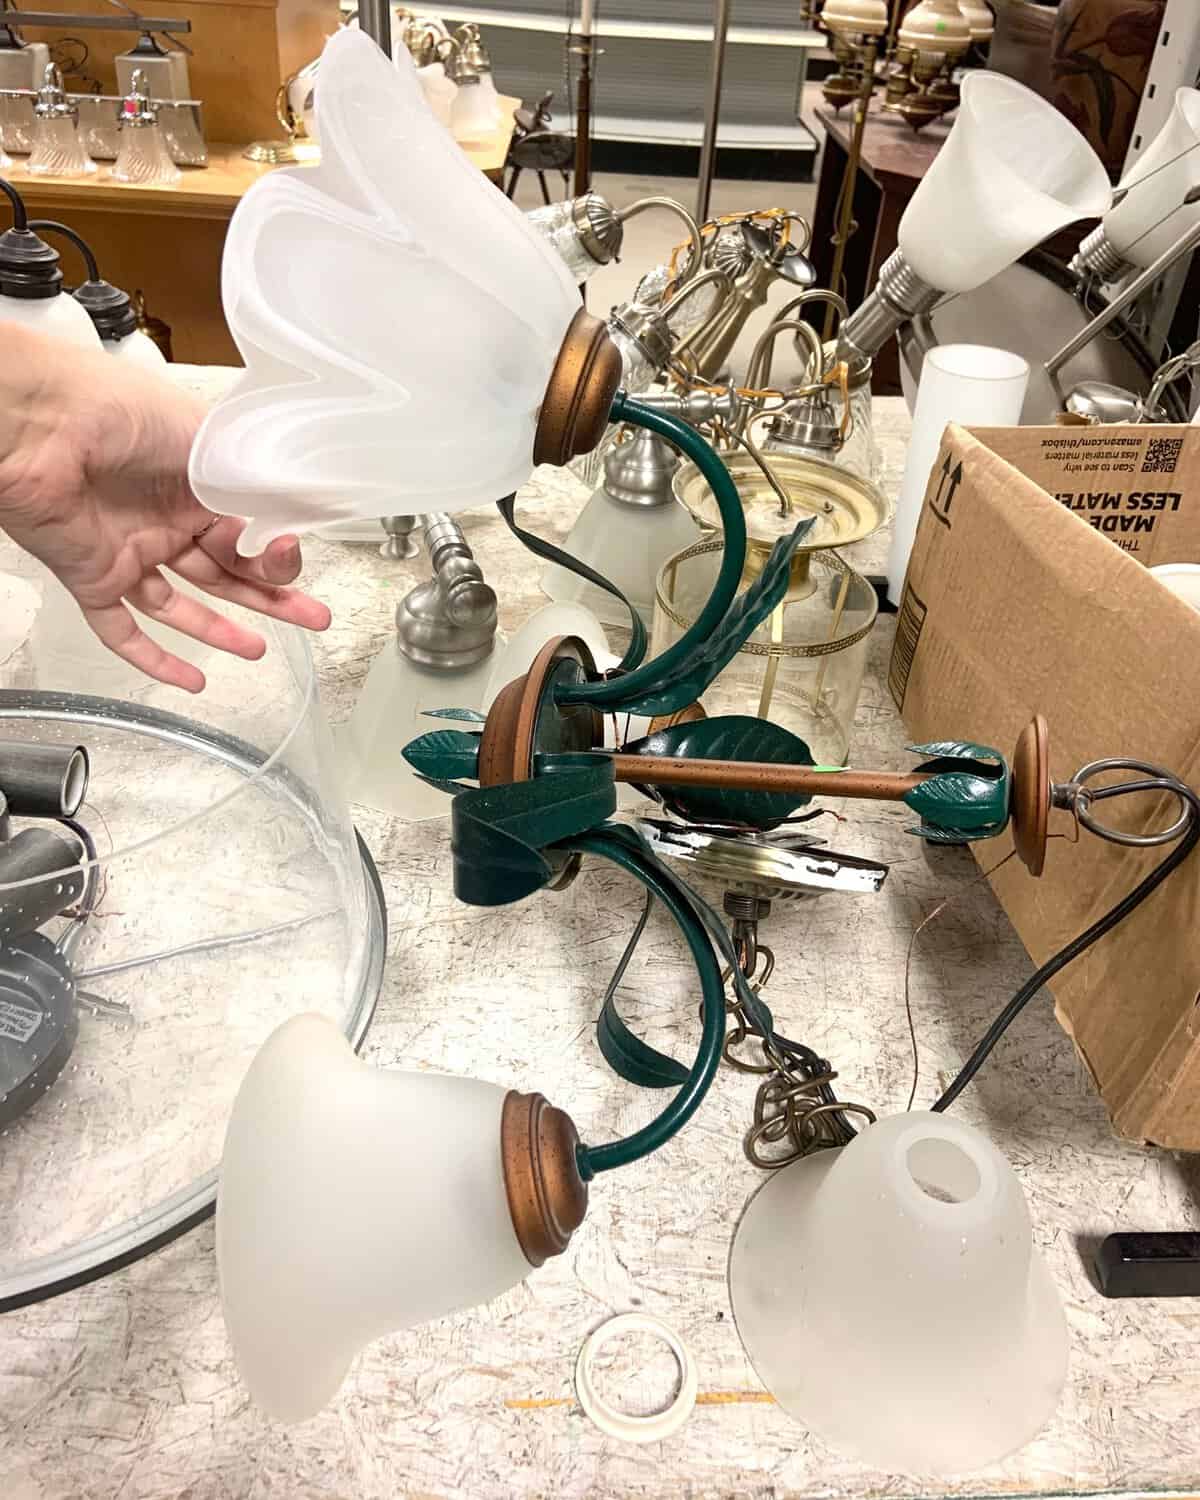
Where there’s a will there’s a way, and thankfully in our town there’s also a Restore.
The Restore is my favorite place to shop for used light fixture. You’ll find amazing deals on light fixtures all under one roof. No hopping from Thrift Store to Thrift Store, the Restore always has a great selection of light fixtures to choose from.
I had Mary go there and check out what light fixtures they had on hand. People updating their homes donate flooring, paint, cabinets, and often light fixtures to the Restore. (If you’ve never been you have to go take a look for yourself. We’ve saved thousands of dollars thanks to this not for profit store.)
Anyway, Mary found a chandelier that she liked except for the light covers. This mama had to help and my mind started figuring out how I could get my baby girl more of what she wanted. At a fraction of the cost of course. I mean it’s me, aka the frugal renovator, and we had already splurged in a few areas of her room. More on that in a later post!

A lot, and I mean a lot like Jess from The New Girl, was going on here.
This light fixture thrift flip started coming together after I saw a photo of a vintage chandelier. Do you remember me telling you how much Mary loves nature, and how we’re trying to incorporate it into the design of her bedroom? Well. we continued that theme with the chandelier.
I came up with the idea, but Mary made it work because the kid is talented and determined. Plus patient, like her Dad. I would have quite on this one when the going got rough.
What We Used for this Light Fixture Flip
Supplies:
- Tinfoil
- Wire
- Florist tape
- Wire cutter
- Scissors
- Mod Podge
- Superglue
- Paper for pattern
- Spray Paint
- Oil Paint
How We Created Flowers to Our Light Fixture
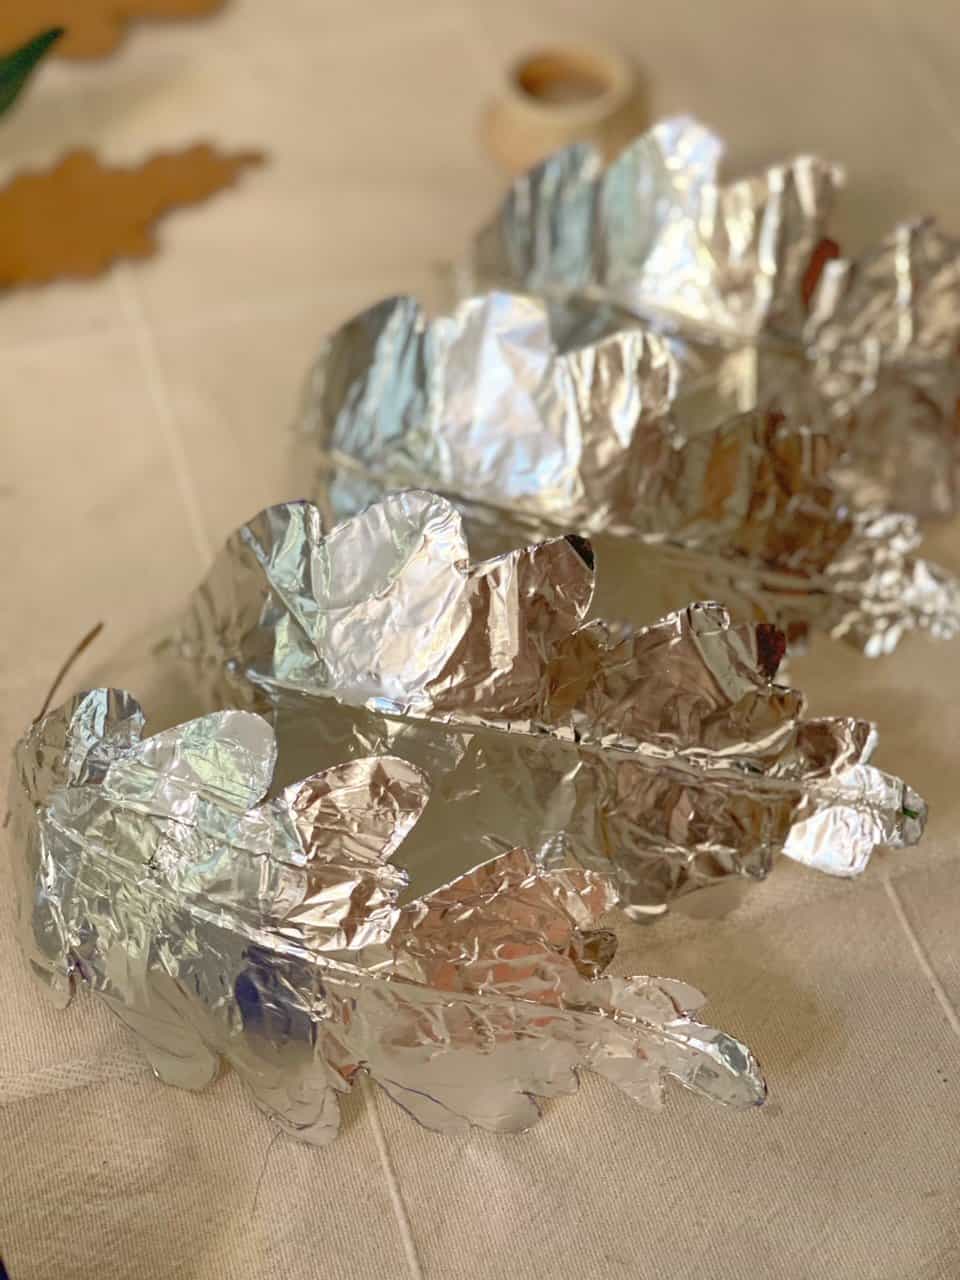
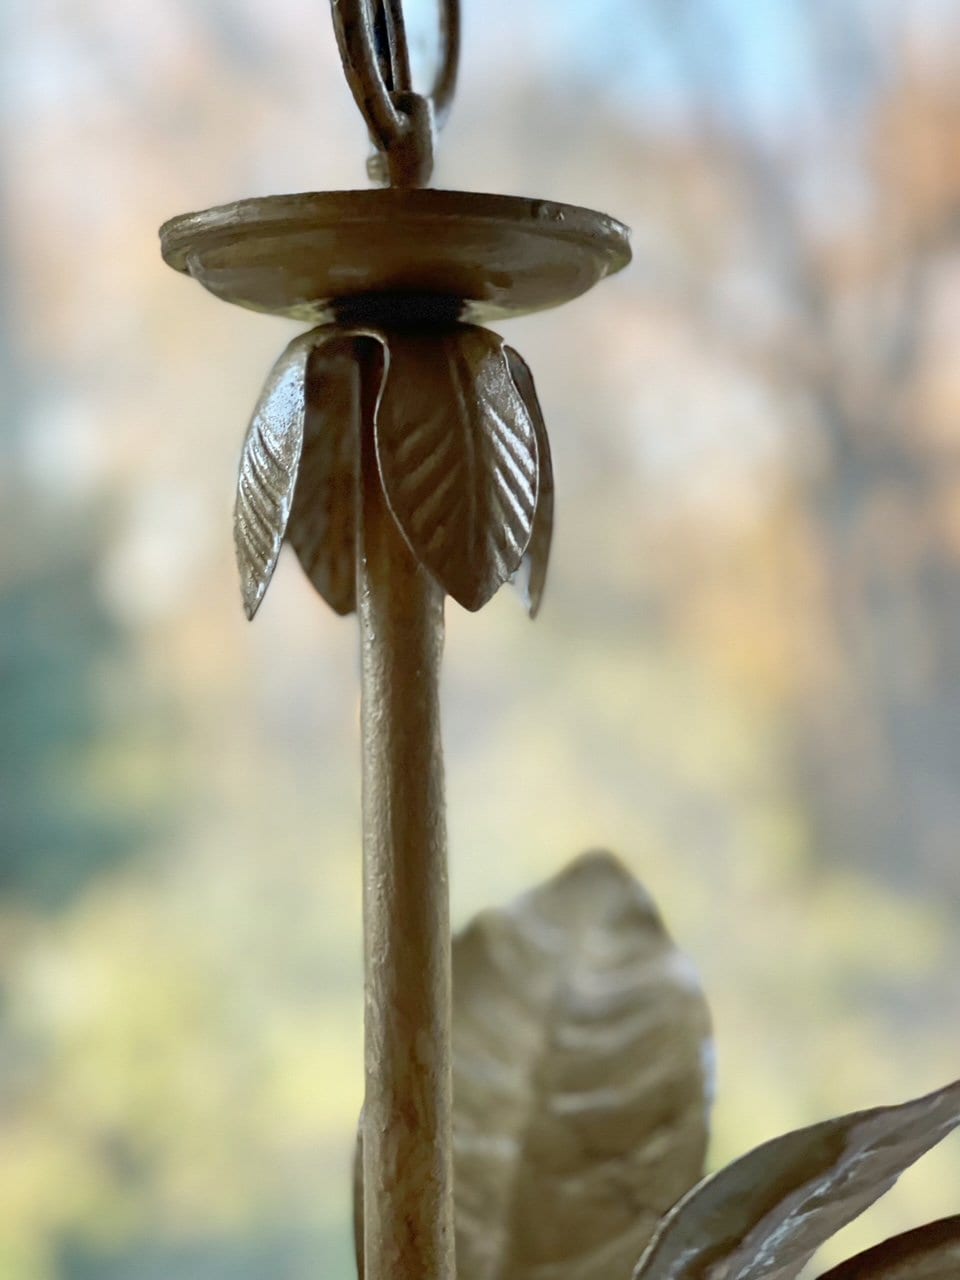
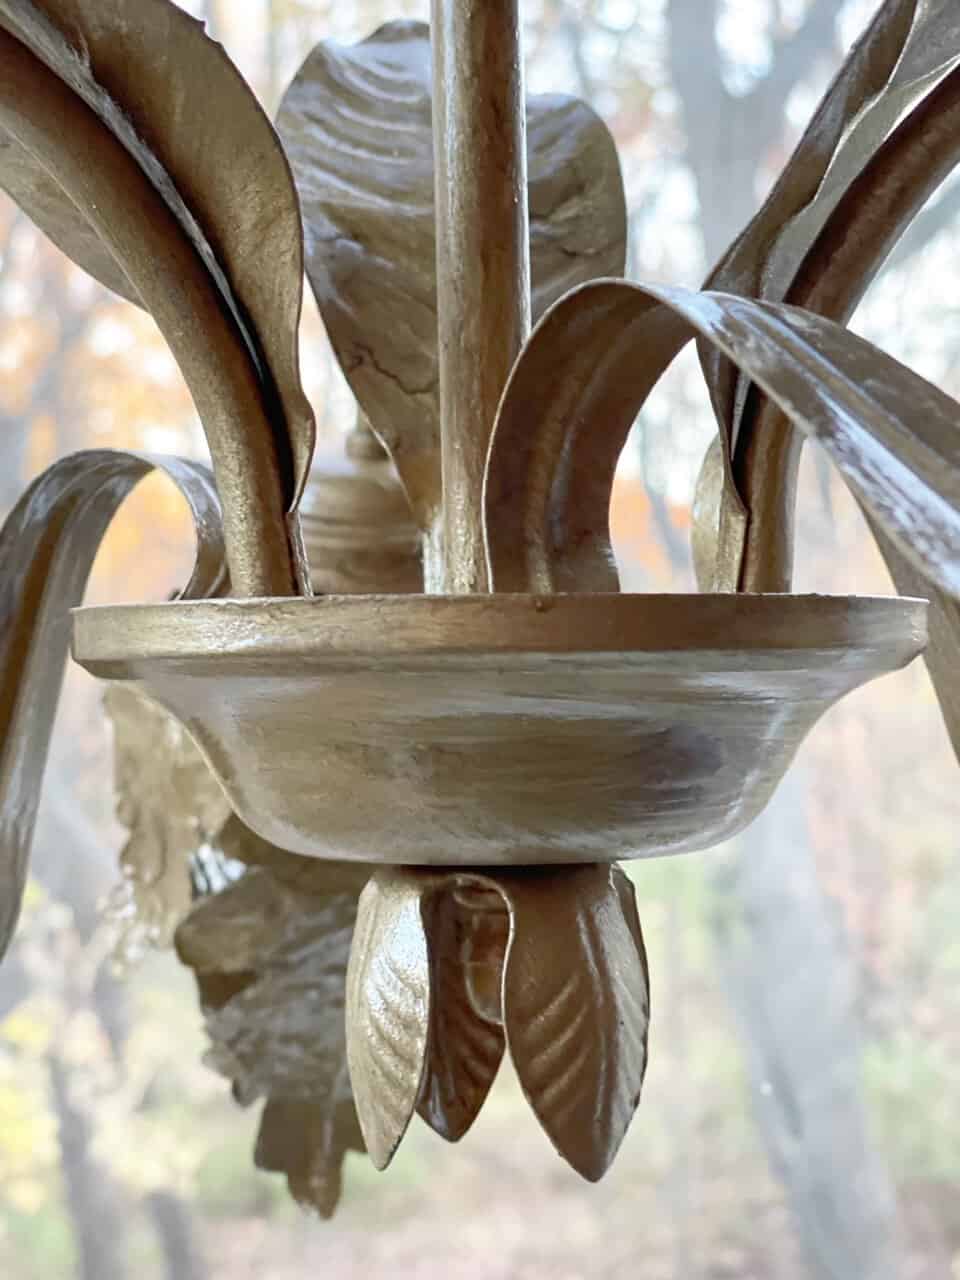
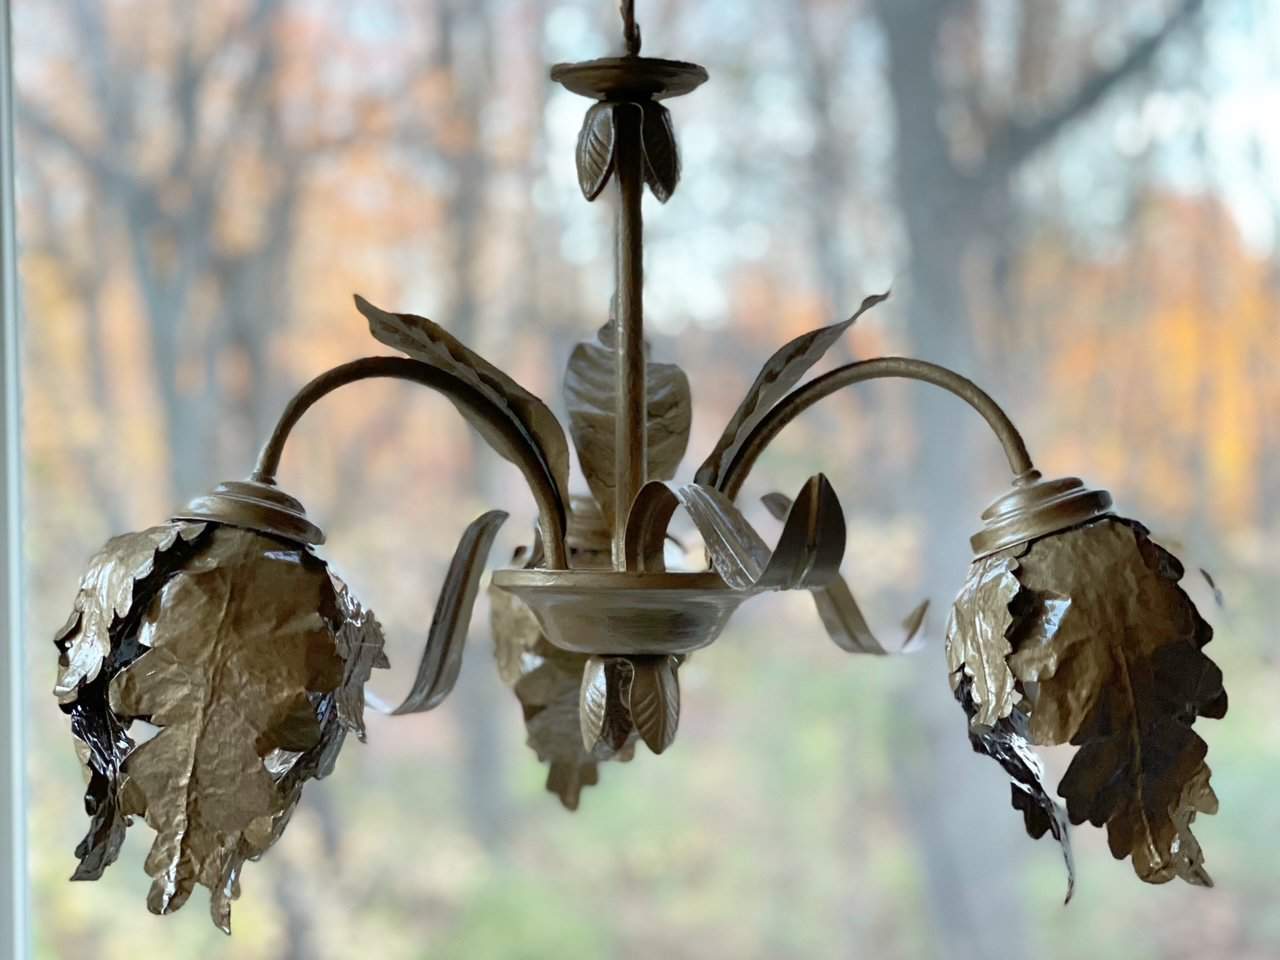
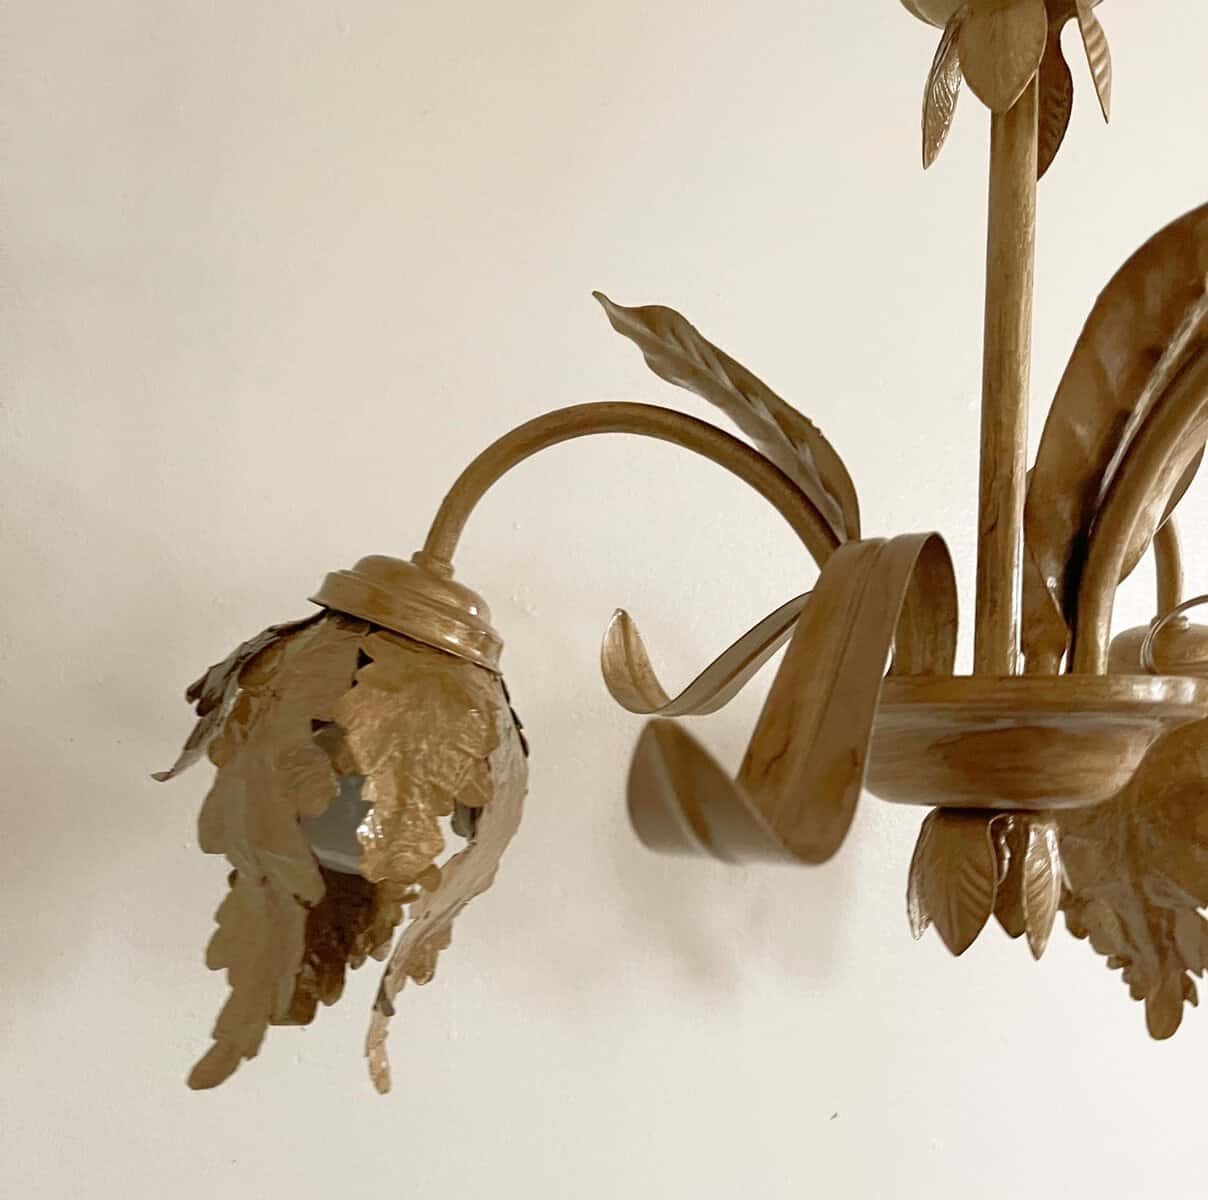
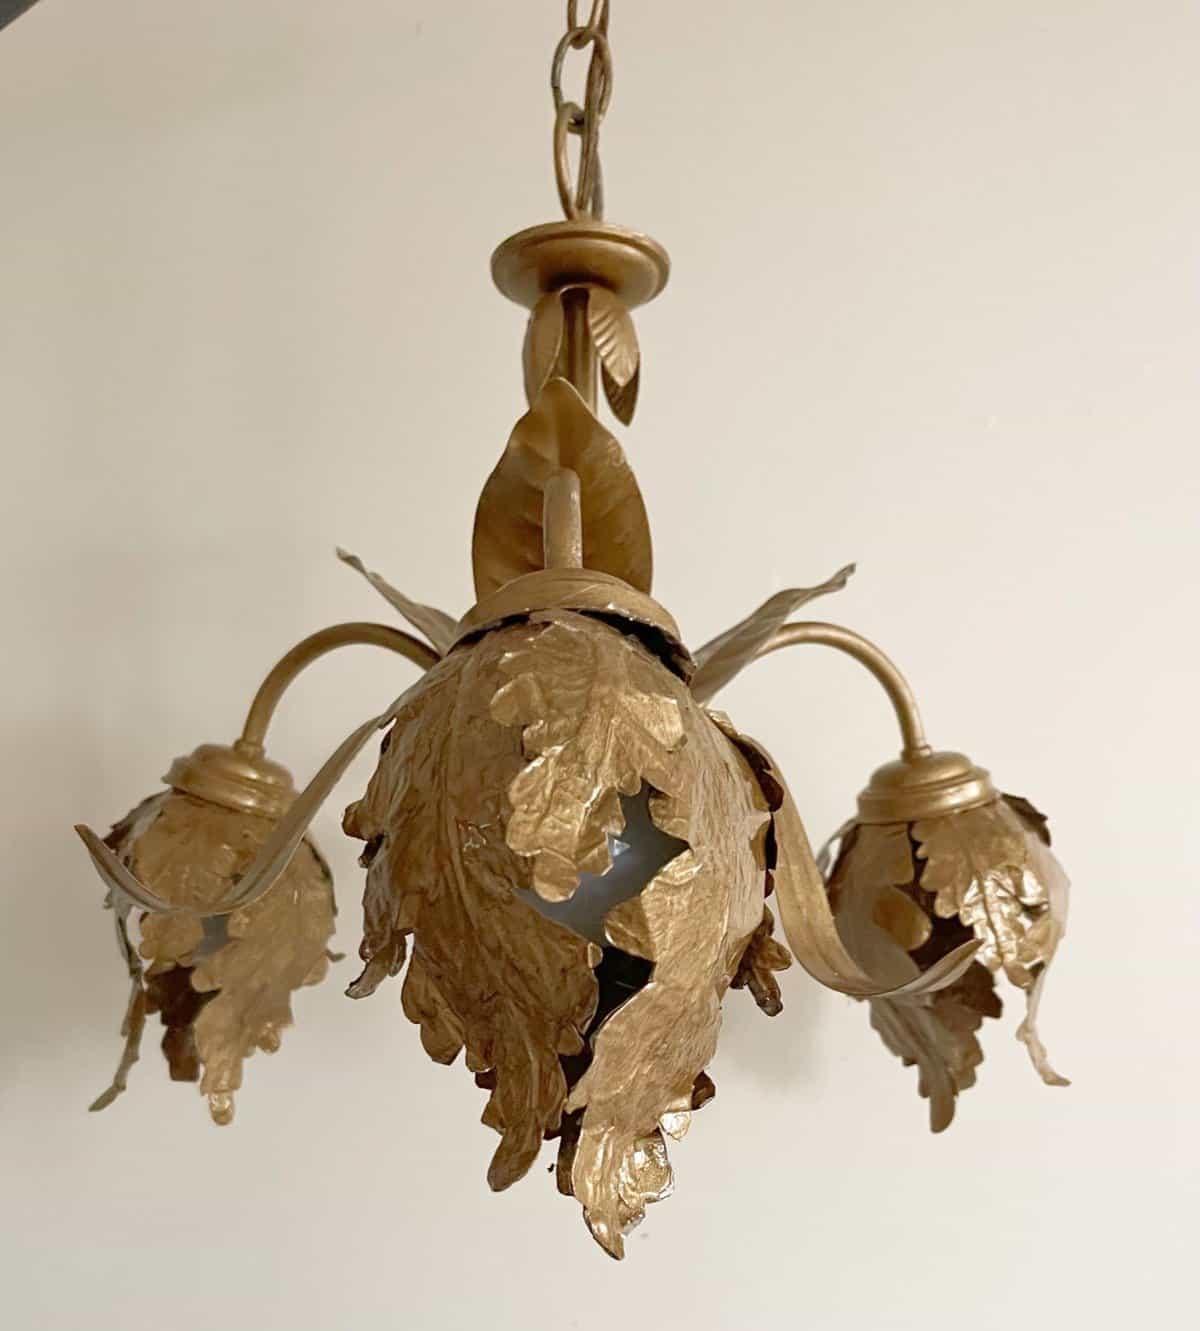
This light fixture already had leaves, now it needed flowers. We got rid of the glass light covers and instead made covers that looked light actual flower pedals!
We needed a light weight material that was malleable so the light bulbs could be replaced when needed and could withstand heat if needed as well. Tinfoil! was our material of choice and it worked great.
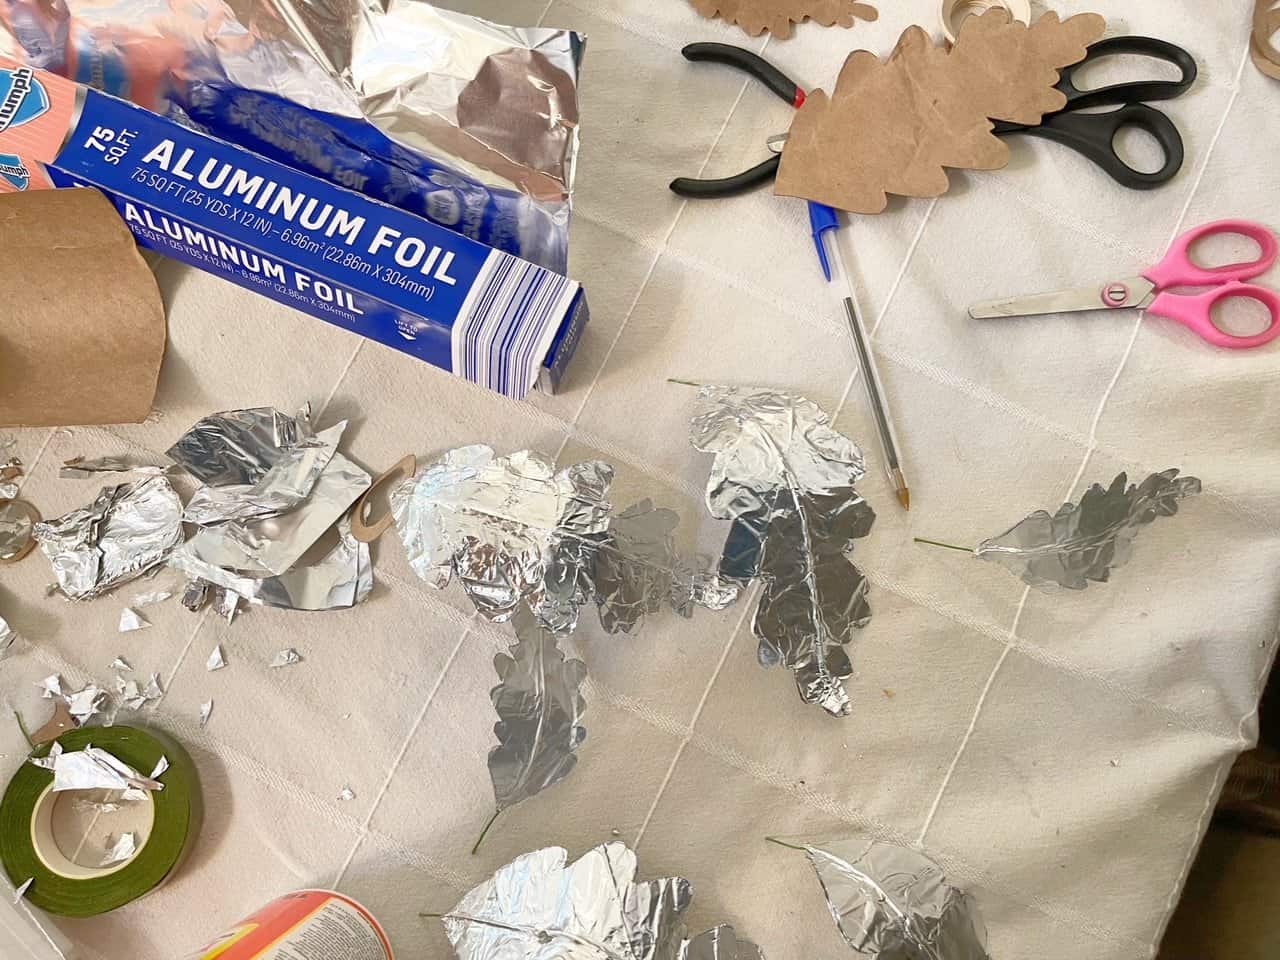
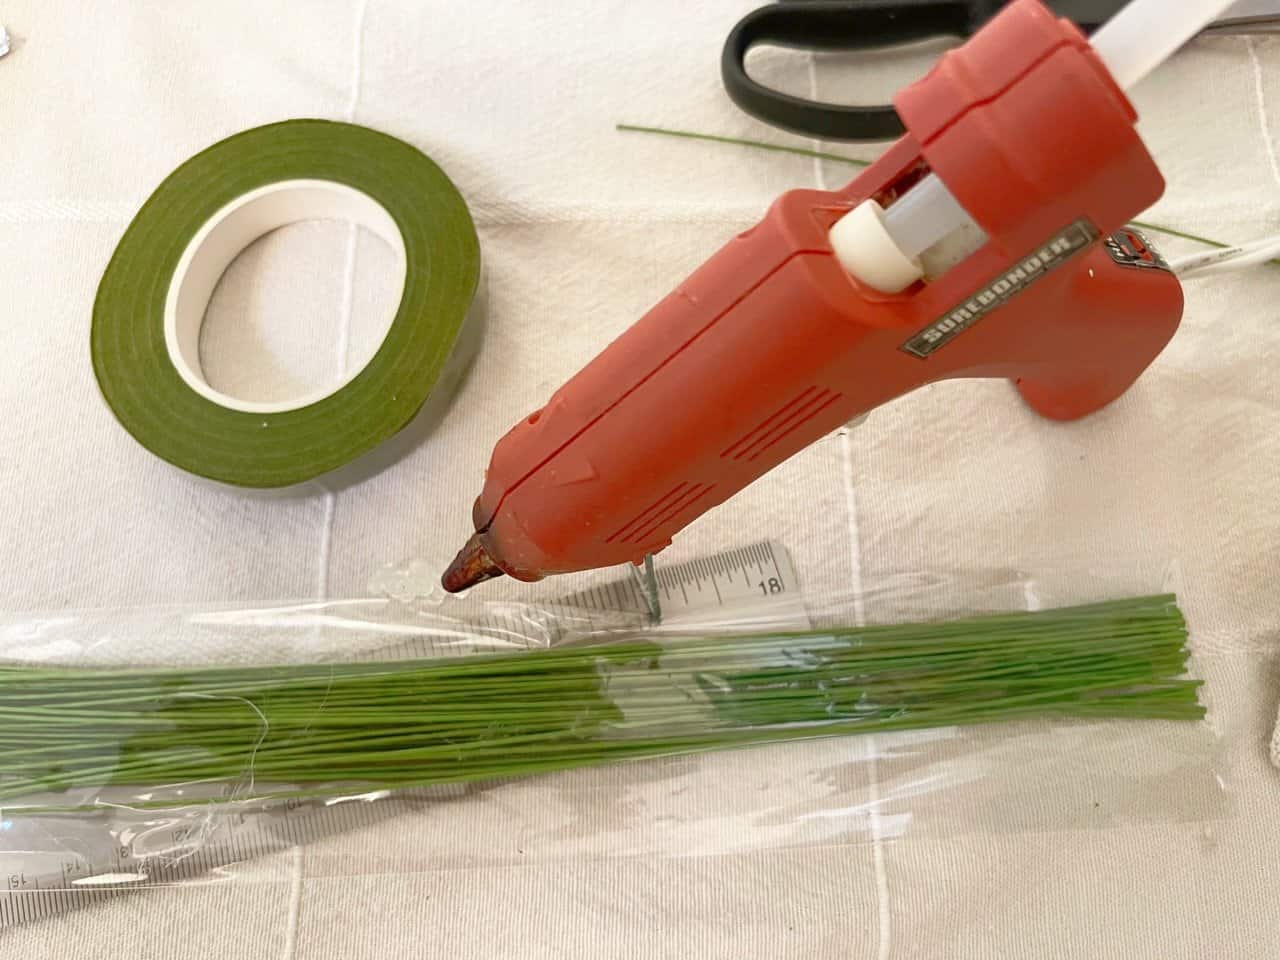
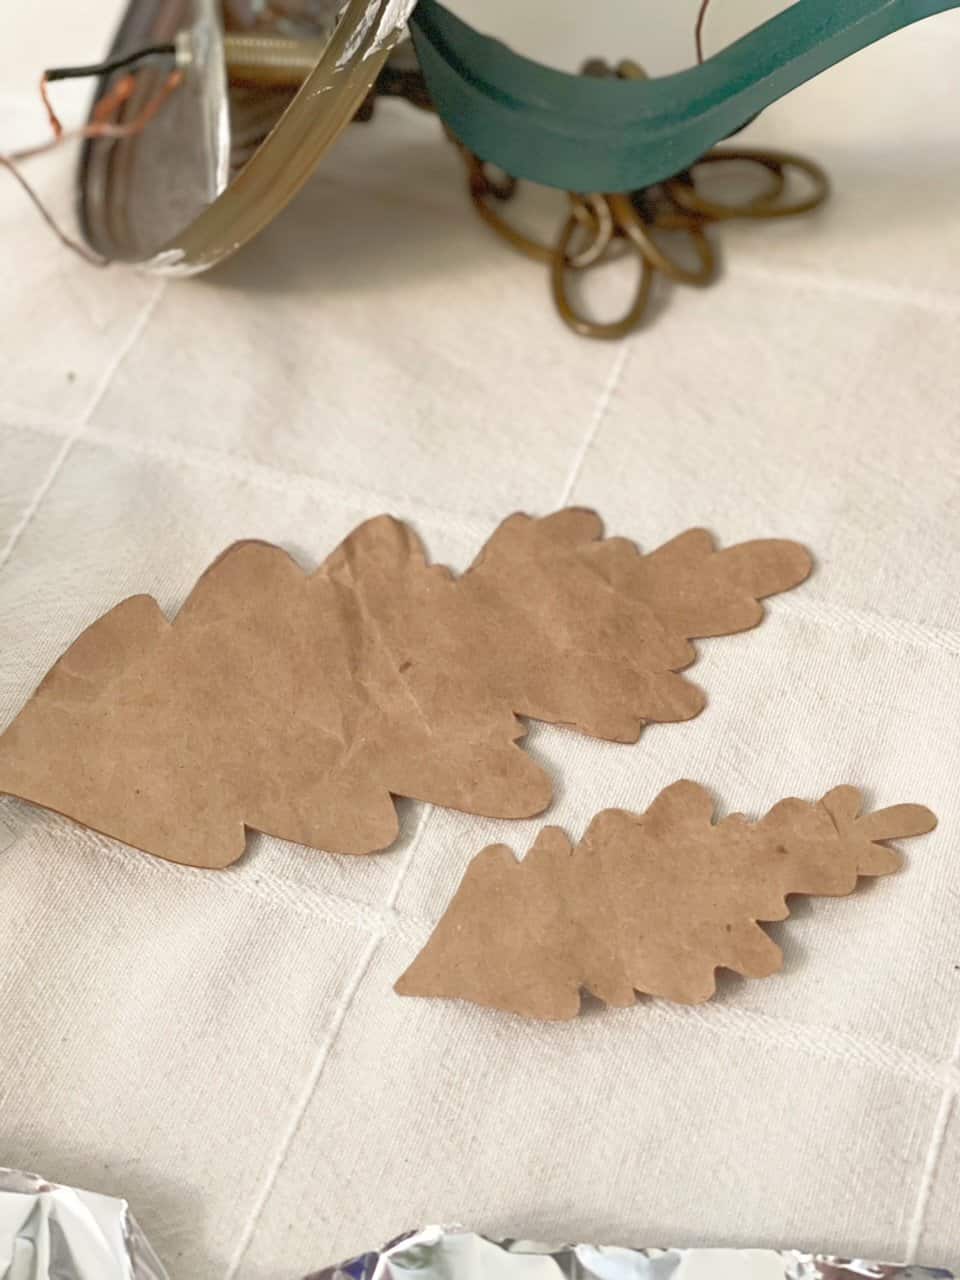
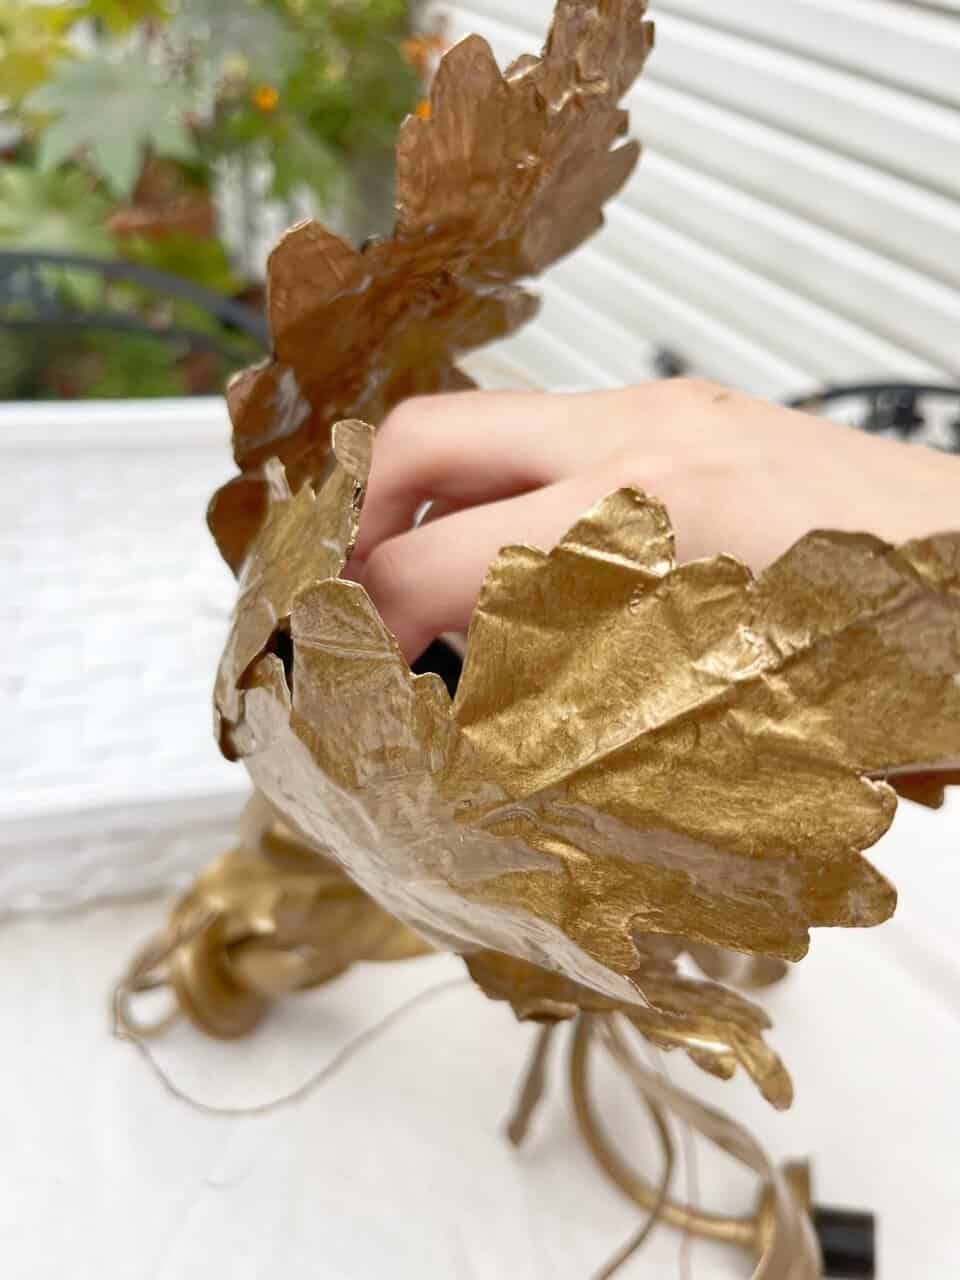
Mary made leaf patterns out of brown paper bags and then cut the tinfoil into their shapes. She used two different sizes. Then she attached the wire to the leaves with mod podge, super glue, floral tape and a little hot glue.
Tip: If you do use hot glue instead of superglue make sure you use LED lights in your light fixture thrift flip. LED lights don’t produce heat which would melt your hot glue and could ruin your light fixture creation.
The Transformative Power of Paint
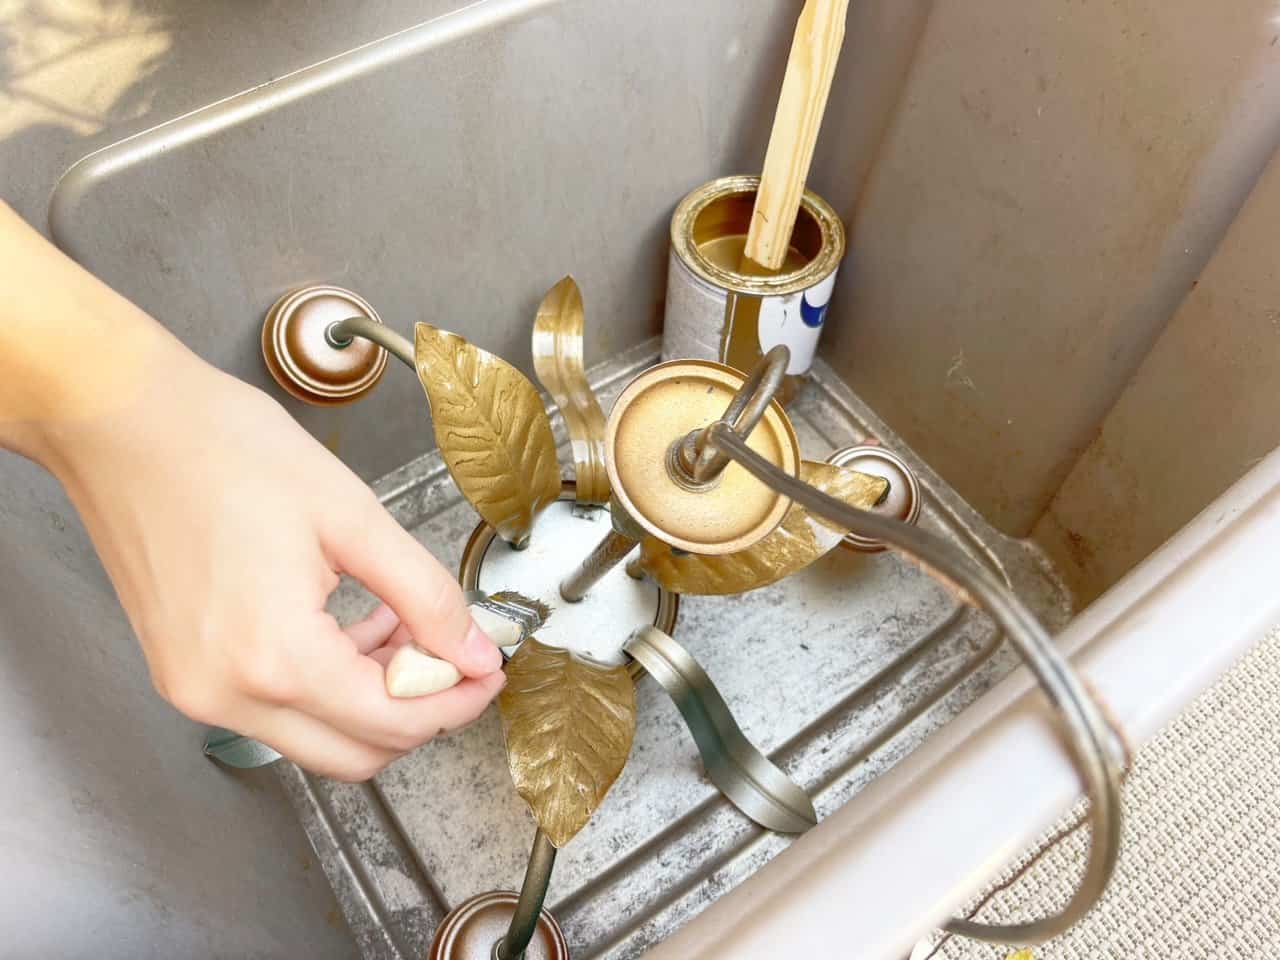
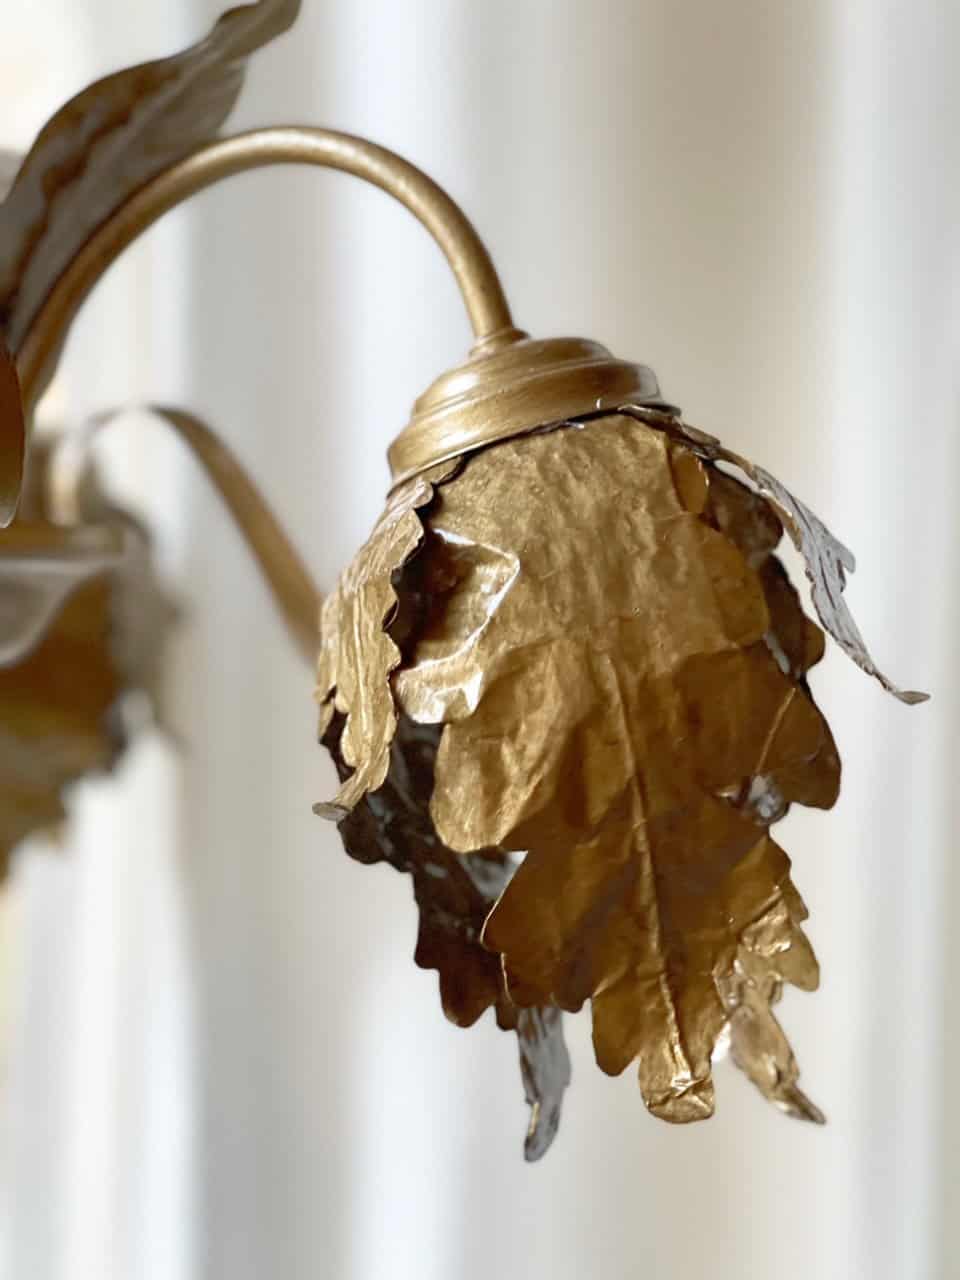
After this we painted the whole chandelier with that gold oil based paint you may have seen before. We’ve been using it a lot in her bedroom makeover.
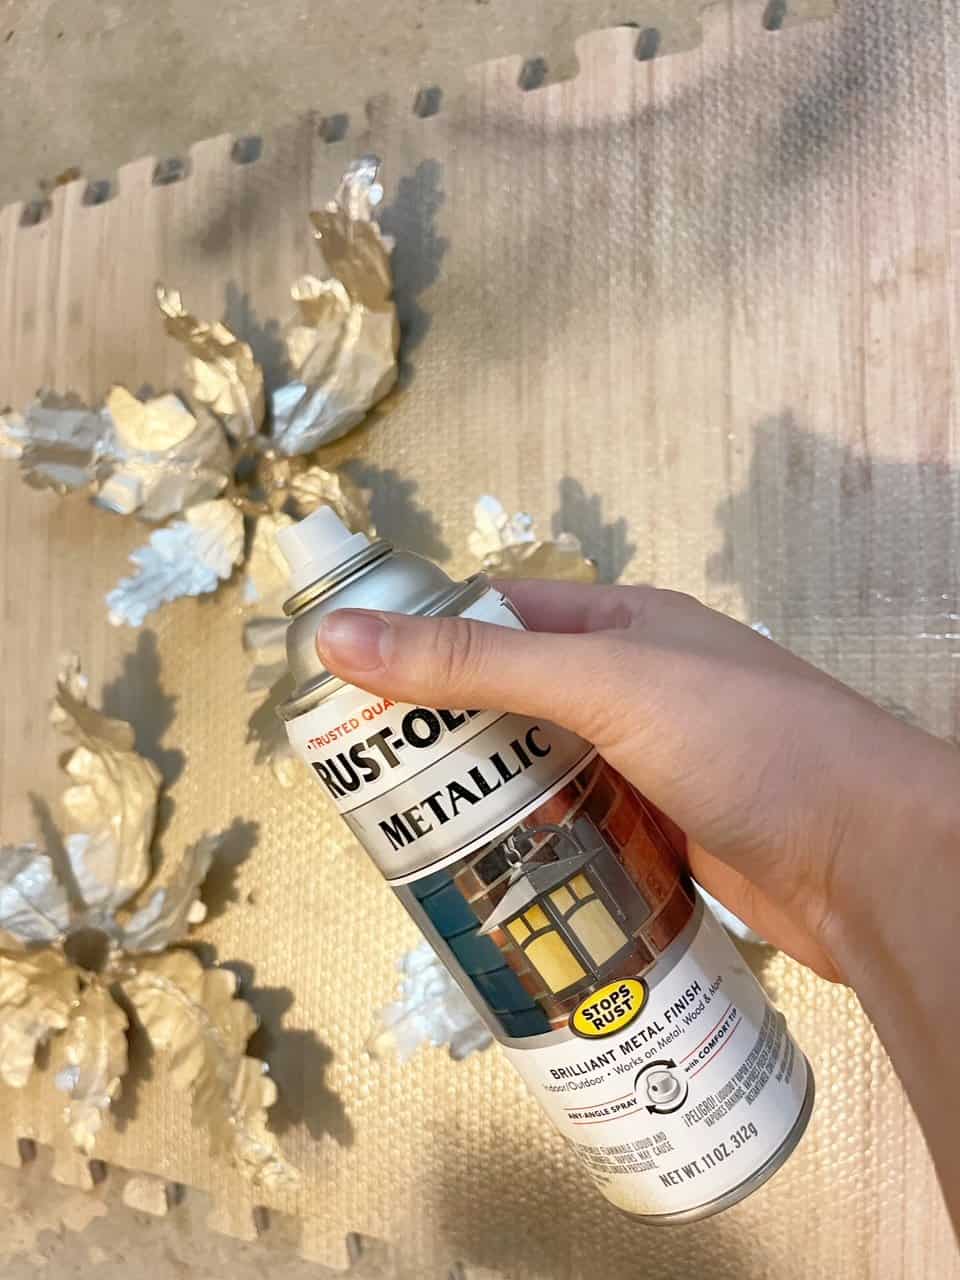
We sprayed the finished leaves with several coats of spray paint. This both strengthen the tinfoil leaves and to change their color from shiny silver to matte gold. Once spray painted they were firmer and could be we painted with a paint brush. We used one coat of the same gold oil based paint that was used on the chandelier.
The oil based gold paint is good stuff. Once dried you’d never know the leaves are made of tinfoil. They almost look like leather.
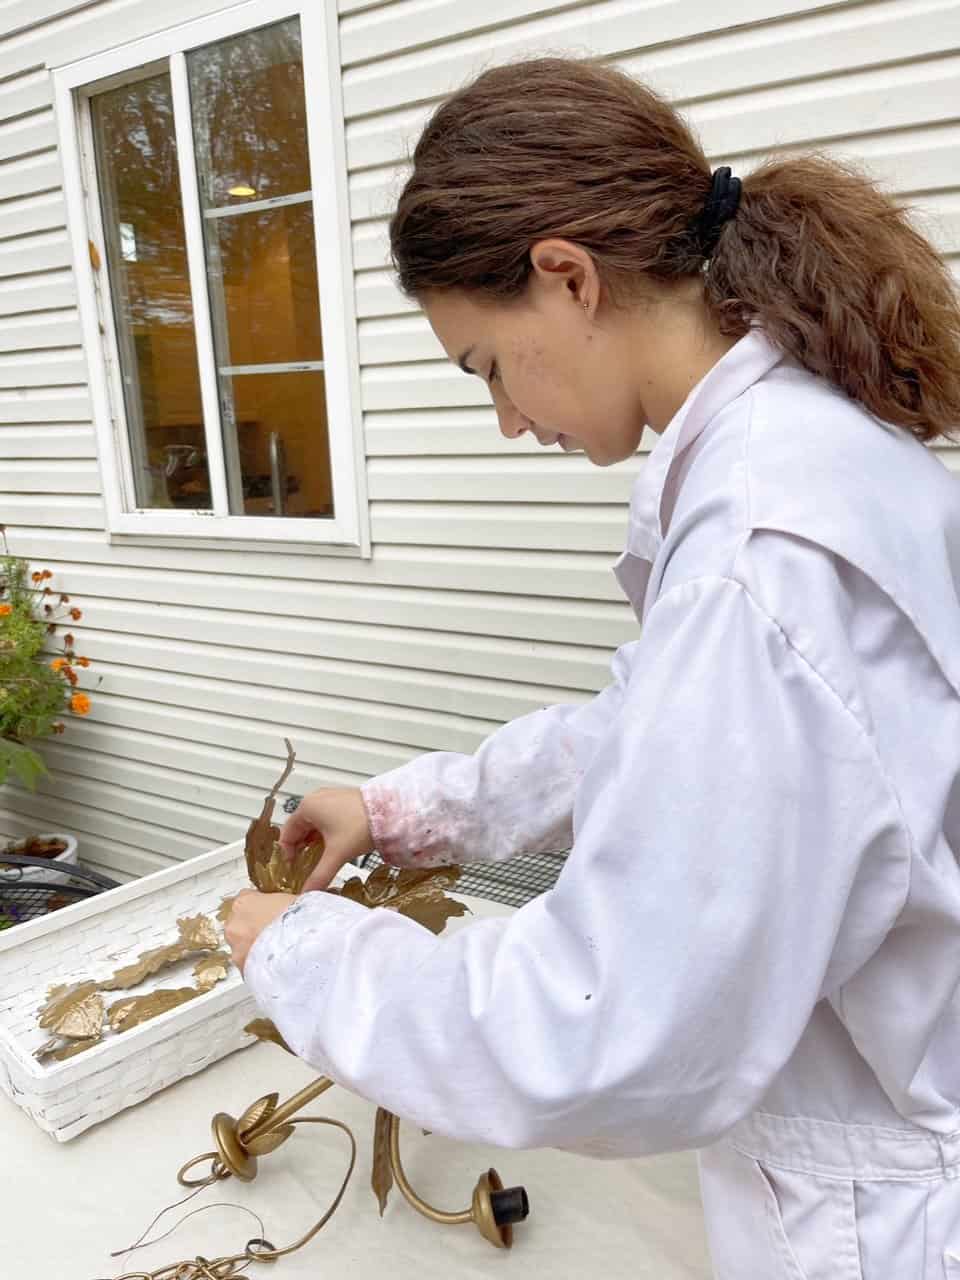
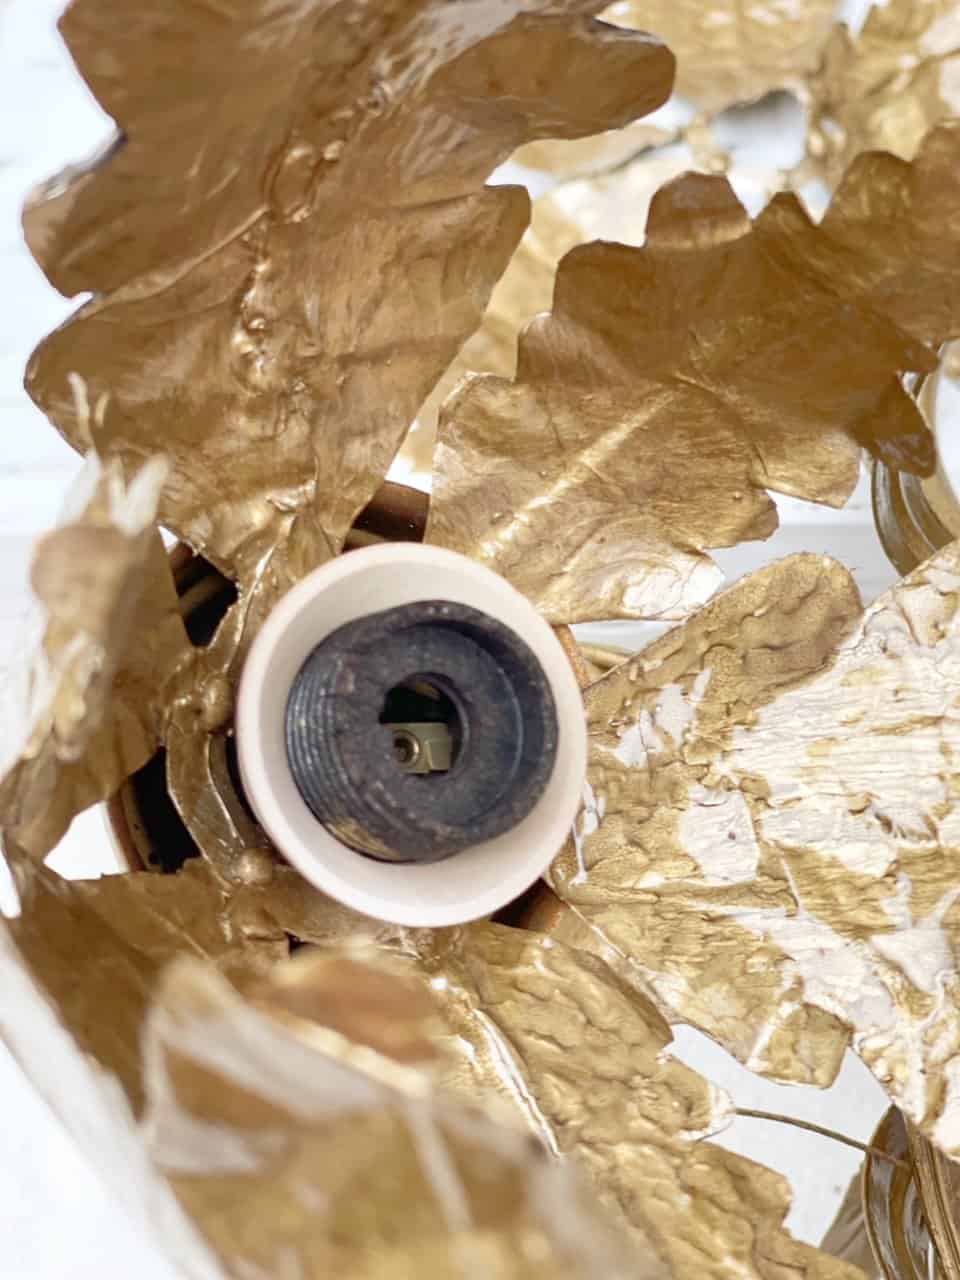
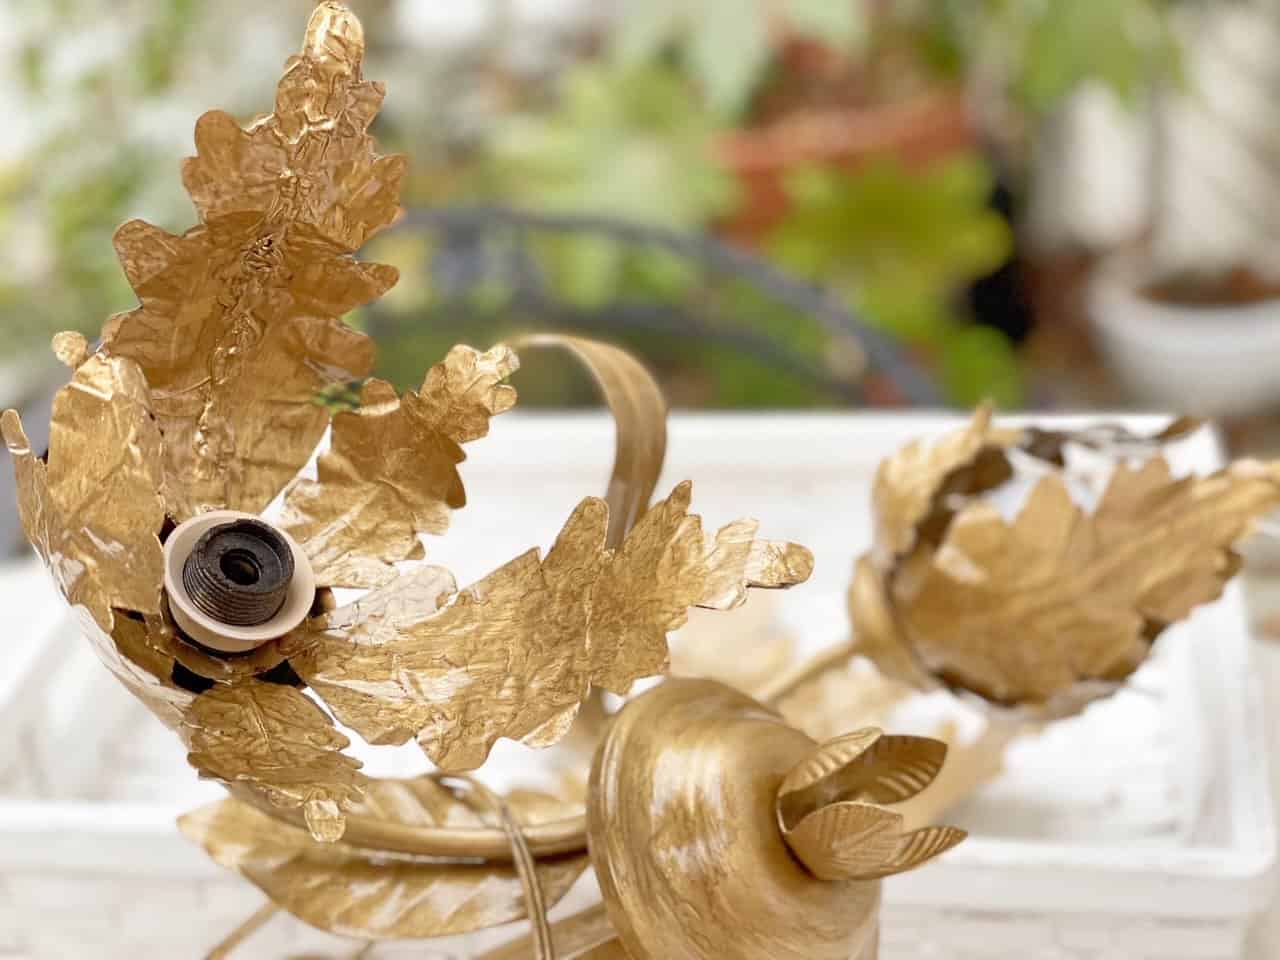
We attached the leaves to the same light bulb ring that was in each light socket. Then came the fun part of putting the leaves/light bulb covers onto our light fixture thrift flip.
The leaves actually closed as you twisted them in which was the engineering of my daughter at work. It was so cool! Can you tell I’m a proud homeschooling mama?
Our Budget Friendly DIY Chandelier Cost Breakdown
Isn’t the outcome incredible?!
Let’s talk financial costs verses time costs. The ratio was $15 of money to 5.5 hours of time spent. This did not include shopping for the chandelier or installing it which we would have done as well if we bought it new. The new chandeliers we were looking at for this room were around $300.
Was it worth it to put so much time into this light fixture in order to transform it?
For us the answer is definitely, YES. Here’s why.
1- We enjoy the process of making something more beautiful. (The time spent together is precious, and we get so much satisfaction from creating.)
2- The financial cost involved was minimal. (The light fixture cost $15, and I had all the other supplies left over from other projects. Nothing was bought in the transformation of this light fixture thrift flip.)
3- Light fixtures are an essential part of any room for both design and function. They set the tone. (The chandelier is an important piece to this bedroom makeover because it’s right in the middle of the room and one of the very first elements you see when you enter.)
We came a long way from the light fixture found at the thrift store. The potential was there just waiting to be brought out.
Loving all the details on this chandelier! What do you think of our light fixture thrift flip? Crazy time consuming, just right or both? There’s no right or wrong answer, just your answer and I’d love to hear it.
Let me know in the comments!

MORE THRIFT FLIP ADVENTURES
- Writing Desk Furniture Flip
- Finally Flipped Our Bedroom Armoire
- The Perfect Foyer Bench Furniture Flip

Pin It & Save It


Bravo on the creativity!! I could tell you thoughts in this project and successfully created the look you want without breaking the bank!!
Thanks so much! Mary brought my idea to life! I knew she could, unlike me she has an engineers mind. Blessings Jamala!
This light fixture flip is so beautiful. What a creative idea to make those leaves. It looks like a vintage chandelier.
Thanks Tammy! That’s what I was hoping for. Have a great weekend friend!
Wow Maria! I just love how you all took an old light fixture and turned it into a beautiful work of art! The creativity you and your daughter have is so inspiring! The light looks amazing! I can’t wait to see the finished room! I bet your daughter is loving this process!
So appreciated Donna, thank you. 🙂
Maria, I love this DIY project! It is so creative and the transformation is amazing! I am so excited to feature your post at this week’s Tuesday Turn About link party. Thank you so much for sharing!
I’m so excited to be featured Lynne! Thanks for noticing all the hard work we put into this light fixture.
Such a great flip! Really grateful you are able to dream so big!
You made it look so vintage. I love it.
Thank you Carol!!!
It’s cleverly creative but I’m wondering just how much actual light comes from it. After all that work, you do want it to serve a lighting purpose effectively.
Thank you! It works beautifully at it’s job, plenty of light is provided by the chandelier.